Swift Setup Guide
Prerequisites
- A TelemetryDeck account. Sign up here if you haven't yet.
- Your app's unique identifier and namespace from the TelemetryDeck Dashboard.
- Xcode 26 or later, Swift 6.2 or later.
- Minimum deployment targets: iOS 15, macOS 12, watchOS 8, tvOS 15, or visionOS 1.
Installing the Swift Package
The TelemetryDeck Swift SDK is distributed via Swift Package Manager.
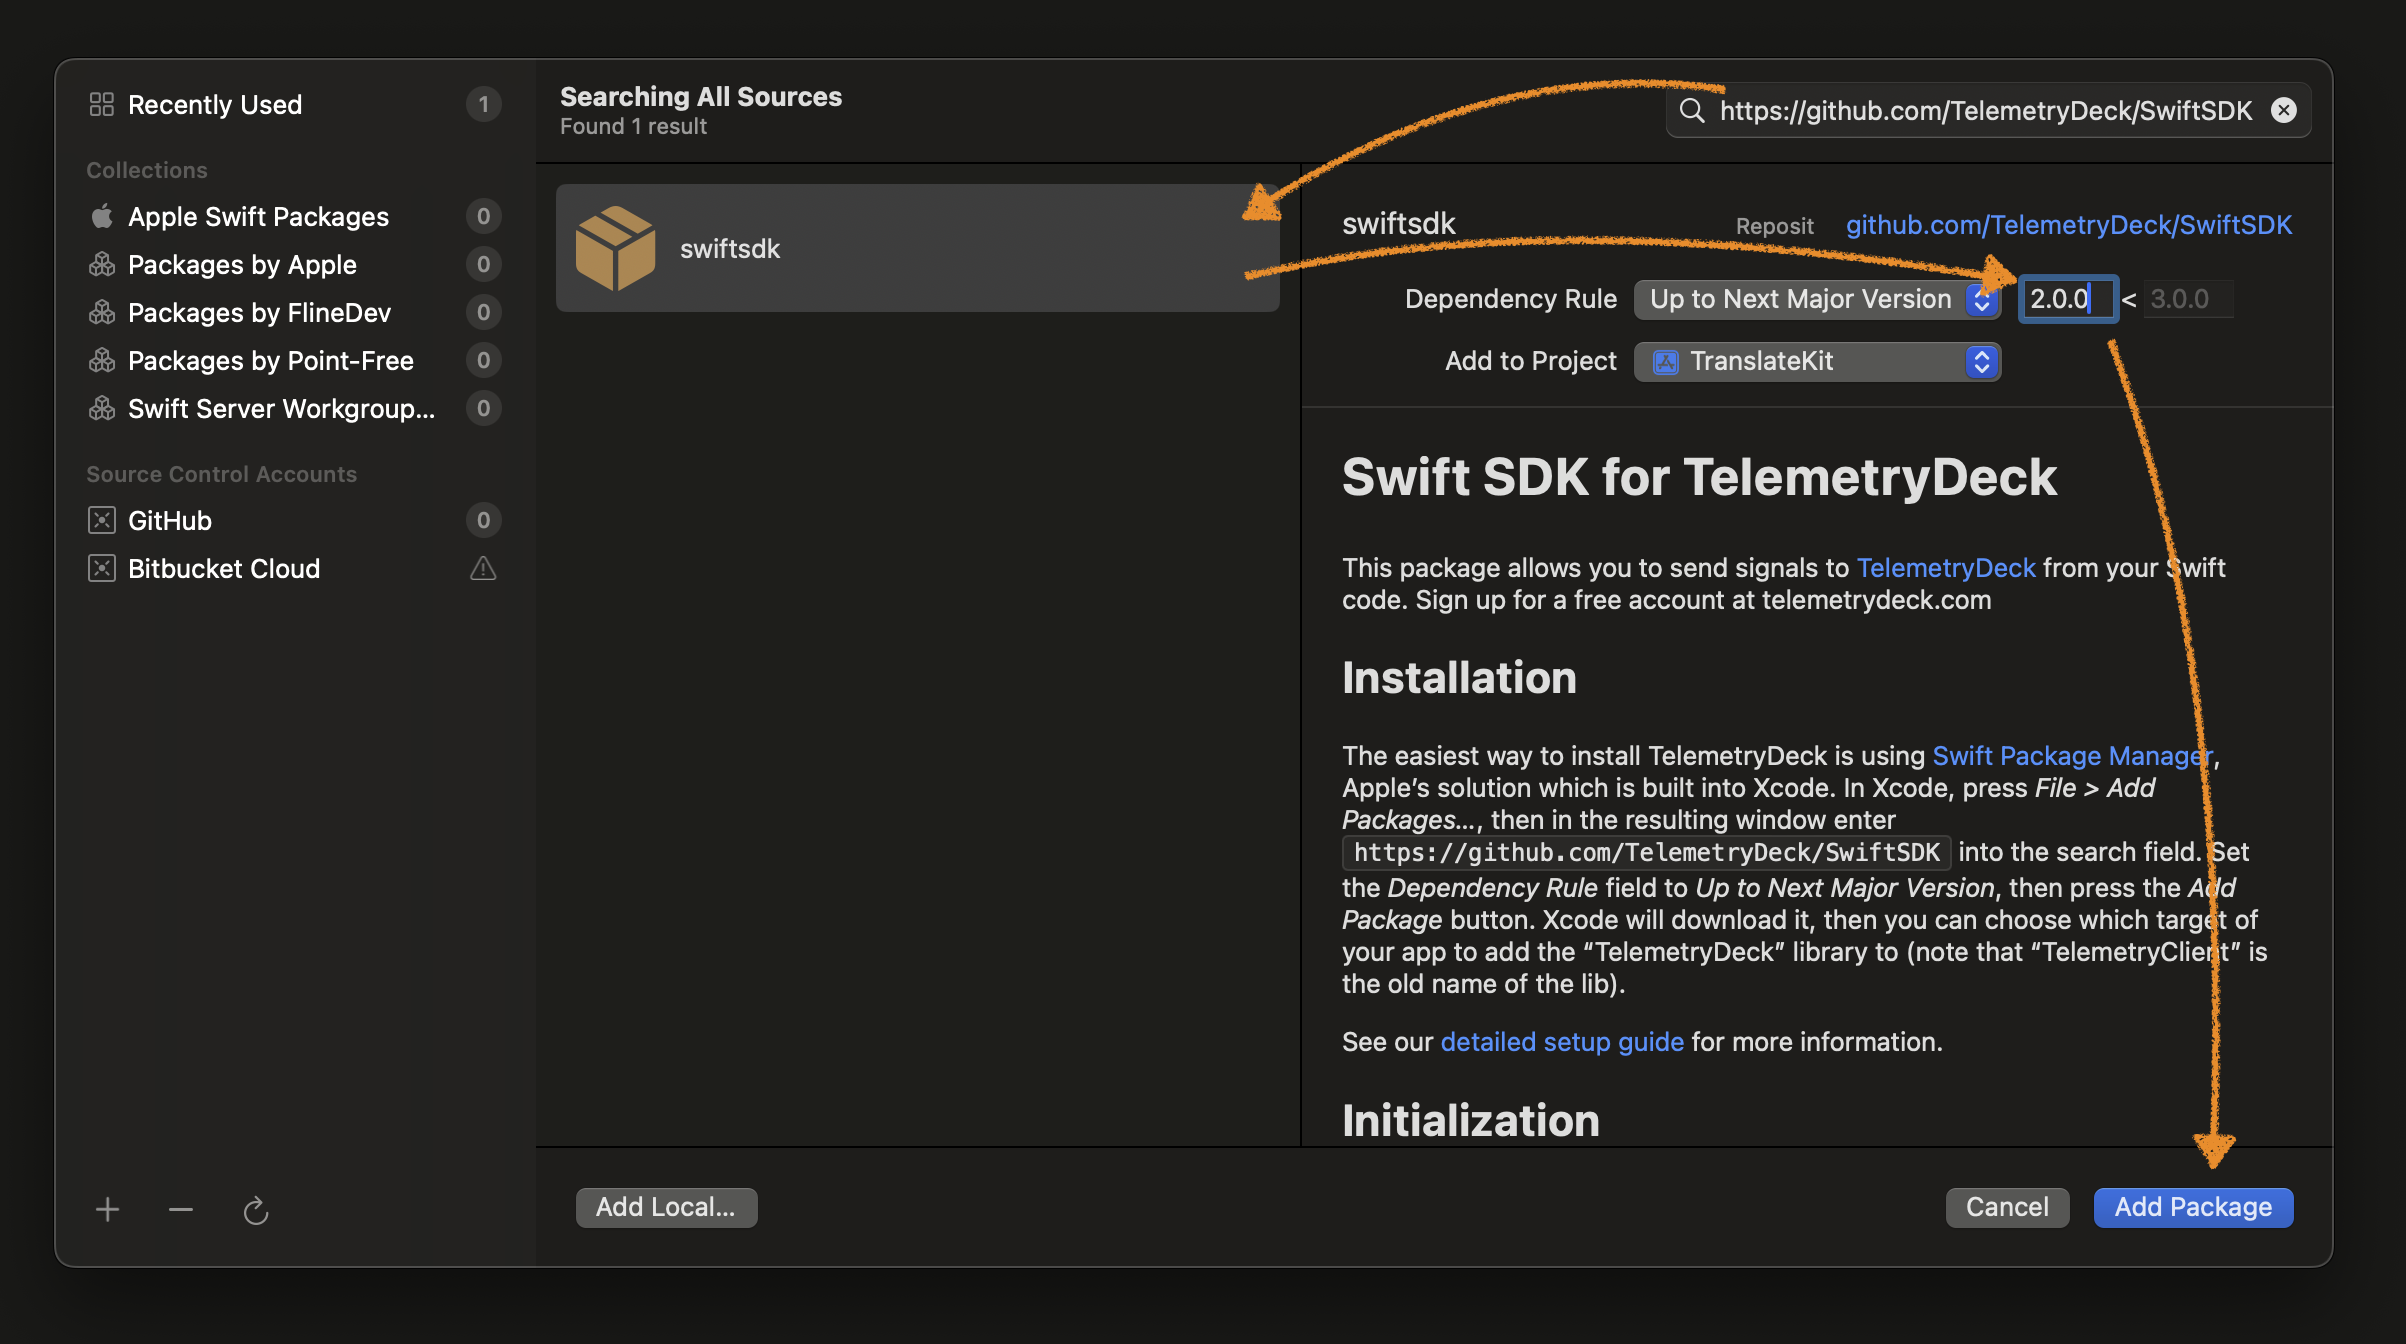
- Open your project in Xcode
- Select File → Add Package Dependencies...
- Paste
https://github.com/TelemetryDeck/SwiftSDKinto the search field - Select the
SwiftSDKpackage that appears in the list - Set the Dependency Rule to Up to Next Major Version
- Click Add Package
Linking the package
Xcode will ask you to link the package with your target. In the screen titled Choose Package Products for SwiftSDK, set the Add to target column to your app target for TelemetryDeck and click Add Package.
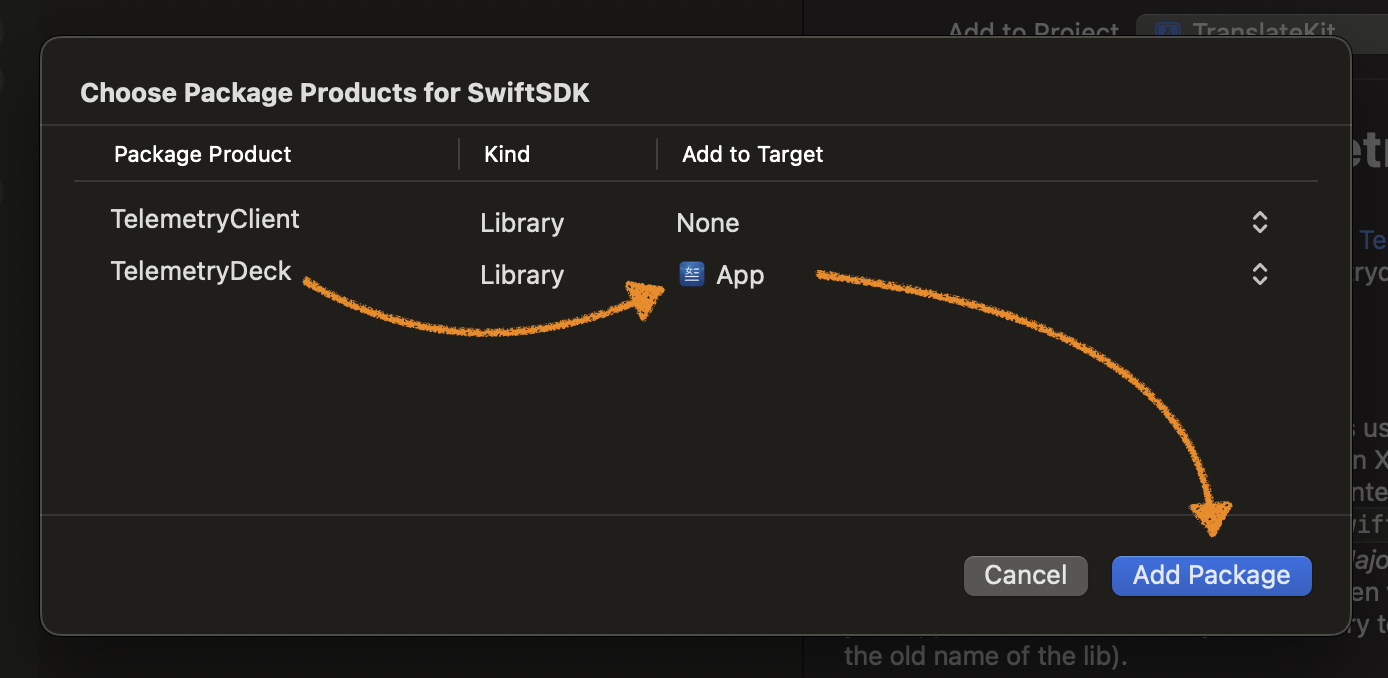
Multiple targets
If Xcode doesn't prompt you, add it manually: select your target → Build Phases → Link Binary With Libraries → + → select TelemetryDeck.
Initializing TelemetryDeck
Initialize TelemetryDeck as early as possible in your app's lifecycle. Events sent before initialization completes are buffered and delivered automatically once it's ready.
You need your app's unique identifier and namespace
Both values are available in the TelemetryDeck Dashboard under your app's settings.
Pick whichever lifecycle approach your app uses — SwiftUI or AppDelegate.
SwiftUI
import SwiftUI
import TelemetryDeck

@main
struct YourApp: App {
    init() {
        Task {
            try? await TelemetryDeck.initialize(
                appID: "YOUR-APP-ID",
                namespace: "YOUR-NAMESPACE"
            )
        }
    }

    var body: some Scene {
        WindowGroup {
            ContentView()
        }
    }
}
AppDelegate
import UIKit
import TelemetryDeck

@main
class AppDelegate: UIResponder, UIApplicationDelegate {
    func application(
        _ application: UIApplication,
        didFinishLaunchingWithOptions launchOptions: [UIApplication.LaunchOptionsKey: Any]?
    ) -> Bool {
        Task {
            try? await TelemetryDeck.initialize(
                appID: "YOUR-APP-ID",
                namespace: "YOUR-NAMESPACE"
            )
        }
        return true
    }
}
Test mode
When running from Xcode in DEBUG configuration, events are automatically tagged as test signals. Enable Test Mode in the TelemetryDeck Dashboard to see them.
Verify your setup
Run your app. The SDK sends a TelemetryDeck.Session.started event automatically on launch. Open the TelemetryDeck Dashboard → "Explore > Recent Signals" with Test Mode enabled — you should see it appear.
That's it. Your app is sending analytics. You can ship this and start getting insights from real users.
Sending custom events
Built-in session tracking covers the basics. Custom events let you answer app-specific questions: which features are popular, where users drop off, what settings they prefer.
Add parameters for more context:
await TelemetryDeck.event(
    "Oven.startBaking",
    parameters: [
        "pizzaMode": dataStore.pizzaMode.isActive,
        "temperature": dataStore.targetTemperature
    ]
)
Parameters accept String, Bool, Int, Double, UUID, and Date values. They're transmitted as native JSON types.
Privacy
The customUserID value is SHA256-hashed before transmission. Parameter values are not hashed — don't include personally identifiable information in parameters.
User identification
TelemetryDeck auto-generates an anonymous user identifier per installation. If you have your own user identity (email, account ID), set it after login:
The identifier is hashed before it leaves the device. For details on how the default identifier is resolved per platform, cross-device tracking, and server-side usage, see User Identification.
Configuration options
The initialize function accepts several optional parameters:
try await TelemetryDeck.initialize(
    appID: "YOUR-APP-ID",
    namespace: "YOUR-NAMESPACE",
    salt: "optional-extra-hash-salt",
    defaultUser: "optional-default-user",
    testMode: nil,
    eventPrefix: "MyApp.",
    parameterPrefix: "MyApp.",
    defaultParameters: [
        "theme": UserDefaults.standard.string(forKey: "theme") ?? "default",
        "tier": isPremium ? "premium" : "free"
    ]
)
| Parameter | Description |
|---|---|
salt |
Extra string mixed into user ID hashing for additional privacy |
defaultUser |
User identifier set at startup |
testMode |
Override automatic test mode detection (true/false/nil for auto) |
eventPrefix |
Automatically prepended to all event names |
parameterPrefix |
Automatically prepended to all custom parameter keys |
sendSessionStartedEvent |
Whether to fire TelemetryDeck.Session.started on each new session (default: true) |
defaultParameters |
Key-value pairs included with every event |
Disabling analytics
Let users opt out:
Check the current state:
Shutting down
If you need to cleanly shut down the SDK (for example before an app extension terminates):
This flushes pending events, persists the cache, and stops all processors.
App Store requirements
Apple requires you to disclose analytics usage in App Store Connect, even for privacy-focused tools like TelemetryDeck. See our Apple App Privacy guide and Privacy FAQ.
What's next
-
Learn how events flow through the processor pipeline and what data is automatically collected.
-
Build your own processors to add domain-specific metadata to every event.
-
Navigate TelemetryDeck, interpret insights, and make data-driven decisions.
-
Upgrading from SwiftSDK 2.x? Here's what changed.